
The Set up guide
The nine steps that get a new studio ready for real bookings, and how each one gets ticked off.
The Set up guide lists everything to do before you take real bookings. Open it from Studio > Set up in the menu. The menu item shows how many steps are left.
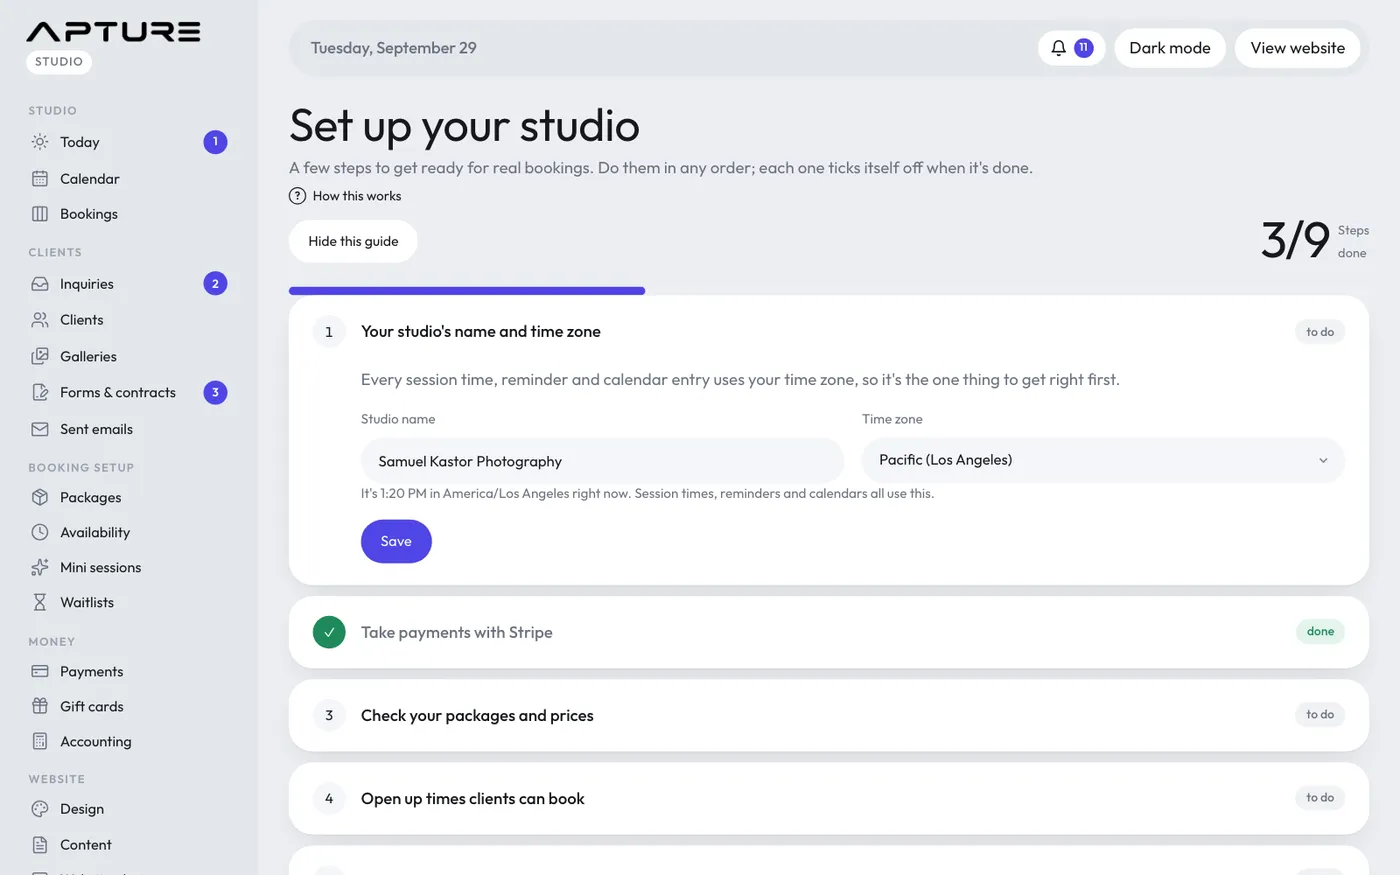
Do the steps in any order. The step to do next is open; click any other step to open it.
The steps
- Your studio's name and time zone. Fill in Studio name and Time zone and click Save. Every session time, reminder and calendar entry uses your time zone, so get this right first.
- Take payments with Stripe. Click Connect Stripe. Until Stripe is connected, your booking page takes inquiries instead of deposits. See Start taking payments with Stripe.
- Check your packages and prices. Your studio starts with a few common sessions. Change the names, prices and deposits to match what you offer.
- Open up times clients can book. Add the days and times you're free. Clients only see what you open.
- Make the website yours. Pick a design, add your logo and a few photos, and write a line about yourself.
- Share your booking link. Put it in your Instagram bio or email signature, or text it to your next client.
- Accept Apture's terms. Read them with Read the terms, then click I accept.
- Remove the sample data. See Example data.
- Choose a plan. Pick a plan before your trial ends. The first charge is when the trial ends.
How steps get ticked
Most steps tick themselves off from what's really in your studio: Stripe connected, at least one real open time, the terms accepted, the sample data gone, a plan chosen. Adding a logo also ticks the website step.
The packages, website and share steps can't be checked automatically, so they have a Mark as done button. If you ticked one by mistake, click Not done yet.
Hiding the guide
Click Hide this guide at the top of the page to take Set up out of the menu. You can still open the page at /admin/setup, and Show in the menu again brings it back. Once every step is done, the guide leaves the menu by itself.